The Crucial Role of Proper Ski Binding Installation
Proper ski binding installation is not merely a technical task; it is a critical undertaking that directly impacts your safety and performance on the slopes. Incorrectly mounted bindings can lead to premature release, unexpected falls, or, conversely, a failure to release during a fall, increasing the risk of serious injury. Beyond safety, a precise installation ensures optimal power transmission from your boots to your skis, allowing for better control, responsiveness, and an overall more enjoyable skiing experience.
Understanding the intricacies of binding installation is essential for every skier, whether you're a seasoned expert or a beginner. While professional installation by a certified technician is always recommended, knowing the process empowers you to understand the importance of each step and to communicate effectively with your ski shop. This guide will walk you through the fundamental aspects, highlighting why precision and attention to detail are paramount.
Step-by-Step Visual Guide to Binding Installation
This section provides detailed, visual instructions for mounting common binding types. Each step is accompanied by an animated demonstration to ensure clarity and precision.
Step 1: Prepare the Ski Surface
Before marking or drilling, ensure the ski surface is clean and free of any debris, wax, or burrs. A clean surface is crucial for accurate measurements and proper adhesion of the binding.

Ensure the ski is stable and well-supported during this process.
Step 2: Mark the Mounting Points
Accurately marking the boot center and corresponding binding screw holes is paramount. Use a proper mounting jig for precision, aligning it with the ski's boot center mark.
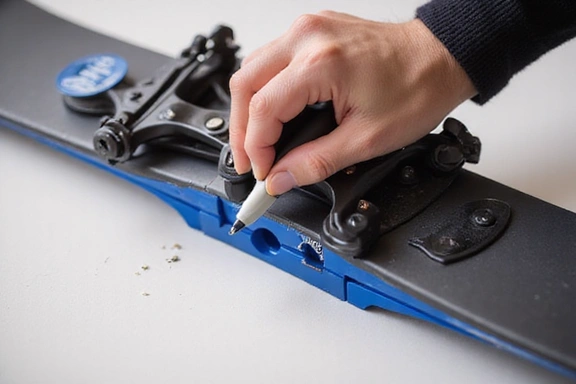
Double-check all measurements before proceeding to the next step.
Step 3: Drill Pilot Holes
Using the correct drill bit size and depth stop for your specific ski and binding model is critical. Drill slowly and steadily, ensuring the holes are perpendicular to the ski surface.
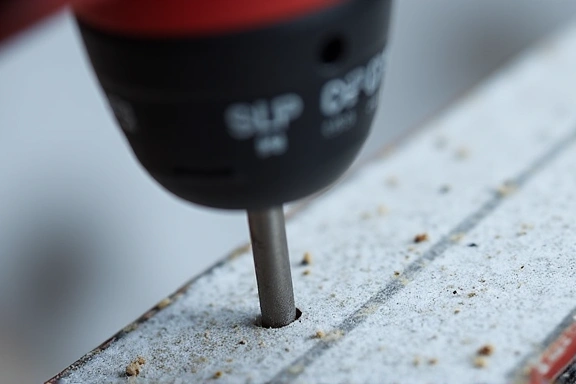
Avoid over-drilling or drilling at an angle, as this can compromise ski integrity.
Step 4: Mount the Binding
Apply a small amount of wood glue or a specialized binding adhesive into each pilot hole to seal them and provide extra security. Carefully align the binding with the holes and gently screw it into place.
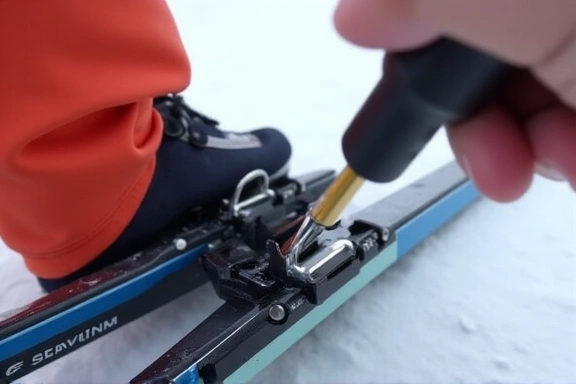
Do not overtighten the screws; tighten them just until they are snug.
Critical Safety Tips for Binding Installation
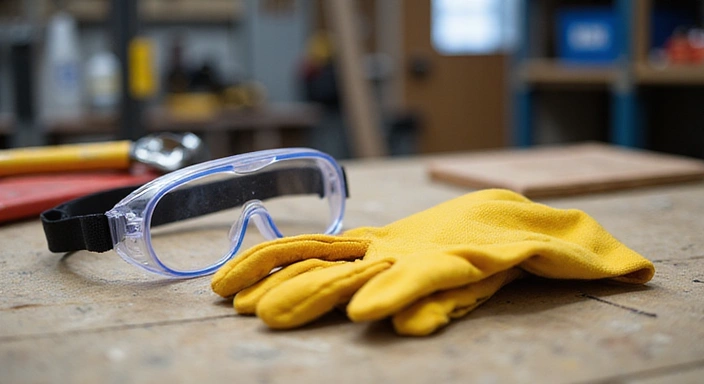
Safety is paramount when working with ski equipment. Adhering to these precautions will minimize risks during the installation process.
- Always Use Appropriate Tools: Ensure you have the correct drill bits, screwdrivers, and mounting jig specific to your binding and ski model. Using improvised or incorrect tools can damage your equipment or lead to an unsafe installation.
- Double-Check All Measurements: Precision is key. Before drilling, meticulously verify all measurements, including boot center, BSL (Boot Sole Length), and screw hole alignment. Even a small error can compromise the binding's function.
- Understand DIN Settings: Proper DIN setting adjustment is crucial for release safety. This often requires specialized equipment and expertise. If unsure, always consult a certified technician. Never guess your DIN setting.
- Secure Your Workpiece: Ensure the ski is firmly clamped or secured during drilling and mounting to prevent slippage and ensure accurate hole placement.
- Ventilate Your Workspace: If using adhesives or solvents, ensure your workspace is well-ventilated to avoid inhaling fumes.
- Seek Professional Help If Unsure: If any step feels beyond your comfort or skill level, do not hesitate to take your skis to a professional ski shop. Your safety on the slopes is worth the investment.
- Inspect for Damage: Before and after installation, carefully inspect both the skis and bindings for any pre-existing damage or damage incurred during the process.
Common Mistakes to Avoid During Binding Installation
Avoiding these frequent errors will significantly improve the success and safety of your binding installation.
Improper Drill Bit Size or Depth
- Using a drill bit that is too large can strip the screw holes, leading to loose bindings.
- A drill bit that is too small can cause the ski core to crack or the screws to break during installation.
- Drilling too deep can compromise the ski's structural integrity or even go through to the base.
- Not drilling deep enough prevents screws from seating properly.
Incorrect Boot Center Mark
- Misaligning the boot center mark on the ski with the boot's actual center can negatively affect ski performance and balance.
- Always use the designated boot center mark on the ski, which is typically indicated by a small line or arrow.
Overtightening Screws
- Applying too much torque can strip the screw threads in the ski core or crack the ski's top sheet.
- Screws should be tightened until snug, then given a slight additional turn, but never forced.
- Use a hand screwdriver for final tightening to better feel the resistance.
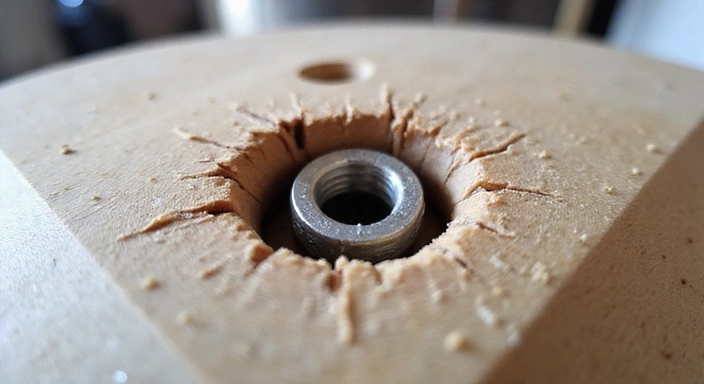
Neglecting to Seal Holes
- Failing to apply wood glue or a specialized binding adhesive into the pilot holes can allow moisture to enter the ski core, leading to delamination or rotting over time.
- This step also helps secure the screws and prevent them from loosening.
Comprehensive Video Tutorials for Visual Learners
For those who prefer a visual learning experience, we've curated a selection of comprehensive video tutorials demonstrating the entire binding installation process for various binding types. These videos offer in-depth explanations and real-time demonstrations to guide you through each step.
Traditional Screw-in Binding Installation
This tutorial covers the standard installation process for traditional screw-in bindings, focusing on precision drilling and secure mounting. Learn about jig usage, hole preparation, and proper screw torque.
Track System Binding Installation
Discover the simpler, tool-free installation often associated with track system bindings. This video highlights how to adjust the binding for different boot sole lengths and secure it onto the integrated track.
Touring Binding Installation (Pin Bindings)
A specialized guide for touring or pin bindings, which require precise alignment for the toe and heel pieces. This tutorial covers the unique mounting challenges and considerations for these lightweight systems.
Binding Adjustment and DIN Setting
Beyond physical installation, this video explains how to properly adjust the forward pressure and set the DIN (release value) for your bindings, a critical step for safety.
For more video resources and tutorials, visit our curated playlist on YouTube:
View Full Video Playlist